Modifying Priors
by Sarah Blunt (2018)
Most often, you will use the Driver class to interact with orbitize. This class automatically reads your input file, creates all of the orbitize objects you need to run an orbit fit, and allows you to run the orbit fit. See the introductory OFTI and MCMC tutorials for examples of working with this class.
However, sometimes you will want to work with the underlying methods directly. Doing this gives you control over the functionality Driver executes automatically, and allows you more flexibility.
Modifying priors is an example of something you might want to use the underlying API for. This tutorial walks you through how to do that.
Goals of this tutorial:
Learn to modify priors in
orbitizeLearn how to fix a parameter at a specific value
Learn about the structure of the
orbitizecode base
[20]:
import numpy as np
from matplotlib import pyplot as plt
import orbitize
from orbitize import read_input, system, priors, sampler
Read in Data
First, let’s read in our data table. This is accomplished with orbitize.read_input:
[21]:
data_table = read_input.read_file('{}/GJ504.csv'.format(orbitize.DATADIR))

print(data_table)
    epoch      object quant1 quant1_err quant2 quant2_err quant12_corr quant_type instrument
-------------- ------ ------ ---------- ------ ---------- ------------ ---------- ----------
      55645.95      1 2479.0       16.0 327.94       0.39          nan      seppa      defsp
      55702.89      1 2483.0        8.0 327.45       0.19          nan      seppa      defsp
     55785.015      1 2481.0       33.0 326.84       0.94          nan      seppa      defsp
     55787.935      1 2448.0       24.0 325.82       0.66          nan      seppa      defsp
55985.19400184      1 2483.0       15.0 326.46       0.36          nan      seppa      defsp
56029.11400323      1 2487.0        8.0 326.54       0.18          nan      seppa      defsp
56072.30200459      1 2499.0       26.0 326.14       0.61          nan      seppa      defsp
Initialize System Object
Next, we initialize an orbitize.system.System object. This object stores information about the system you’re fitting, such as your data, the total mass, and the parallax.
[22]:
# number of secondary bodies in system
num_planets = 1

# total mass & error [msol]
total_mass = 1.22
mass_err = 0.08

# parallax & error[mas]
plx = 56.95
plx_err = 0

sys = system.System(
    num_planets, data_table, total_mass,
    plx, mass_err=mass_err, plx_err=plx_err
)
The System object has a few handy attributes to help you keep track of your fitting parameters. System.labels is a list of the names of your fit parameters, and System.sys_priors is a list of the priors on each parameter. Notice that the “prior” on parallax (plx) is just a float. That’s because we fixed this parameter at the printed value by specifying that plx_err=0.
Finally, System.param_idx is a dictionary that maps the parameter names from System.labels to their indices in System.sys_priors.
[23]:
print(sys.labels)
print(sys.sys_priors)
print(sys.param_idx)

# alias for convenience
lab = sys.param_idx
['sma1', 'ecc1', 'inc1', 'aop1', 'pan1', 'tau1', 'plx', 'mtot']
[Log Uniform, Uniform, Sine, Uniform, Uniform, Uniform, 56.95, Gaussian]
{'sma1': 0, 'ecc1': 1, 'inc1': 2, 'aop1': 3, 'pan1': 4, 'tau1': 5, 'plx': 6, 'mtot': 7}
Explore & Modify Priors
Priors in orbitize are Python objects. You can view an exhaustive list here. Let’s print out the attributes of some of our priors:
[24]:
print(vars(sys.sys_priors[lab['ecc1']]))
print(vars(sys.sys_priors[lab['sma1']]))
{'minval': 0.0, 'maxval': 1.0}
{'minval': 0.001, 'maxval': 10000.0, 'logmin': -6.907755278982137, 'logmax': 9.210340371976184}
Check out the priors documentation (linked above) for more info about the attributes of each of these priors.
Now that we understand how priors are represented and where they are stored, we can modify them! Here’s an example of changing the prior on eccentricity from the current uniform prior to a Gaussian prior:
[32]:
mu = 0.2
sigma = 0.05

sys.sys_priors[lab['ecc1']] = priors.GaussianPrior(mu, sigma)

print(sys.labels)
print(sys.sys_priors)
print(vars(sys.sys_priors[lab['ecc1']]))
['sma1', 'ecc1', 'inc1', 'aop1', 'pan1', 'tau1', 'plx', 'mtot']
[Log Uniform, Gaussian, Sine, Uniform, Uniform, Uniform, 56.95, Gaussian]
{'mu': 0.2, 'sigma': 0.05, 'no_negatives': True}
Let’s do one more example. Say we want to fix the inclination to a particular value (i.e. not allow it to vary in the fit at all), perhaps the known inclination value of a disk in the system. We can do that as follows:
[8]:
sys.sys_priors[lab['inc1']] = 2.5

print(sys.labels)
print(sys.sys_priors)
print('Inclination "prior:" {}'.format(sys.sys_priors[sys.param_idx['inc1']]))
print('Eccentricity prior: {}'.format(sys.sys_priors[sys.param_idx['ecc1']]))
['sma1', 'ecc1', 'inc1', 'aop1', 'pan1', 'tau1', 'plx', 'mtot']
[Log Uniform, Gaussian, 2.5, Uniform, Uniform, Uniform, 56.95, Gaussian]
Inclination "prior:" 2.5
Eccentricity prior: Gaussian
Run OFTI
All right! We’re in business. To finish up, I’ll demonstrate how to run an orbit fit with our modified System object, first with OFTI, then with MCMC.
[8]:
ofti_sampler = sampler.OFTI(sys)

# number of orbits to accept
n_orbs = 500

_ = ofti_sampler.run_sampler(n_orbs)

plt.figure()
accepted_eccentricities = ofti_sampler.results.post[:, lab['ecc1']]
plt.hist(accepted_eccentricities)
plt.xlabel('ecc'); plt.ylabel('number of orbits')

plt.figure()
accepted_inclinations = ofti_sampler.results.post[:, lab['inc1']]
plt.hist(accepted_inclinations)
plt.xlabel('inc'); plt.ylabel('number of orbits')
[8]:
Text(0, 0.5, 'number of orbits')


Run MCMC
[33]:
# number of temperatures & walkers for MCMC
num_temps = 3
num_walkers = 50
# number of steps to take
n_orbs = 500
mcmc_sampler = sampler.MCMC(sys, num_temps, num_walkers)
# number of orbits to accept
n_orbs = 500
_ = mcmc_sampler.run_sampler(n_orbs)
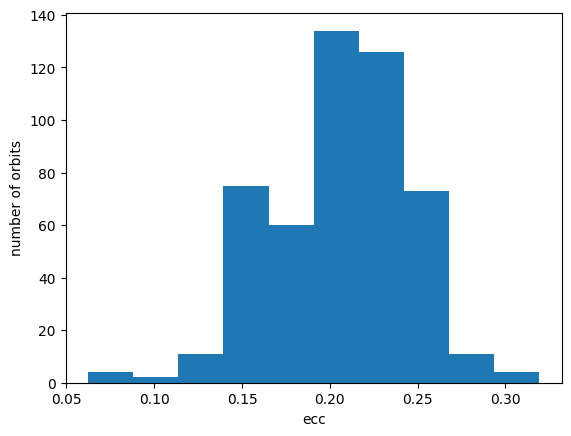
accepted_eccentricities = mcmc_sampler.results.post[:, lab['ecc1']]
plt.hist(accepted_eccentricities)
plt.xlabel('ecc'); plt.ylabel('number of orbits')
Starting Burn in

Burn in complete. Sampling posterior now.
10/10 steps completed
Run complete
[33]:
Text(0, 0.5, 'number of orbits')
The MCMC sampler will automatically take the priors from the system used to instantiate it. However, updates to the system priors made after the sampler instantiation will not be propogated to the sampler, and thus will not be used when running MCMC. The recommended practice when modifying priors is to first instantiate and modify system priors, then instantiate the sampler. When modifying priors we also recommend instantiating the system and sampler objects individually, rather than instantiating a driver object.